
Today we’re going to talk about simulating faraway audio how to make something that’s far away in the video sound far away even if you recorded it with clean audio.
First I’m going to give you the inside tip of the quick and dirty version of this. Afterwards we’ll do a little more advanced version.
Recipe for Success
Now let’s talk about how we do this. First we’re going to talk about three different parameters to add to clean audio to make it sound far away. The first one is very intuitive; it’s volume. The further away something is the lower the volume gets. That’s an easy one. The second one is equalization. How does the sound change when it’s really far away. And the third is reverberation.
Let’s do a little listen through to Micah’s audio next to my audio in the field.
Okay so we really can’t hear Micah as he wasn’t on mic at all. We chose not to use a wireless lav on him because he’s going to end up yelling and it’s still going to sound close. So we opted out of that. We also could have used a boom mic on the camera but for me that would have picked up not only him yelling but the whole world also. If I tried to boost his level, I’d bring the noise level of the world around him and that would be a mess to fix in post. So instead we opted to do clean audio later and just get him yelling on the field to do the performance. In fact we have a field recording that we had running. Let’s take a listen.
It’s not much better. So what do we do? First thing we do is we bring Micah back into my office and this is a more controlled area. I put him about 6 inches away from the microphone then I had him repeat his performance as if he was yelling at me from a mountainside. One of the keys is the performance that he delivers has to match the action on the screen. So don’t just act like you’re yelling, you really have to yell. But I bought the gain down really low on the microphone so when he yelled it didn’t peak.
This is Micah’s raw ADR. It’s a nice, flat, controlled clean sound.
Now I can start adding stuff.Also, I want to make sure I get room tone. Now obviously we weren’t in a room, we’re out in the field. But I still want to get a recording of the environment so that when I mix things later it sounds like they’re all coming from the same space.
What if you didn’t record room tone? I’ve done this a lot of times. Sometimes you can find some room tone in other takes. There could be moment before the cameras roll where people are kind of quiet or even when action is called and the actor kind of sits and thinks for a second. You could steal three seconds here, five seconds there, and then loop that. But generally speaking always try and get room tone.
Volume
Make sure all your tracks are separate. So my voice, Micah’s voice, sound effects, music, room tone, all on different tracks. From there I can use the AUDIO TRACK MIXER in Premiere. If you haven’t seen it, go up to WINDOW and to AUDIO TRACK MIXER. Now this interface is really cool because it allows me to control the volumes and the pan levels of individual tracks.

Audio Track Mixer is in the Window menu.
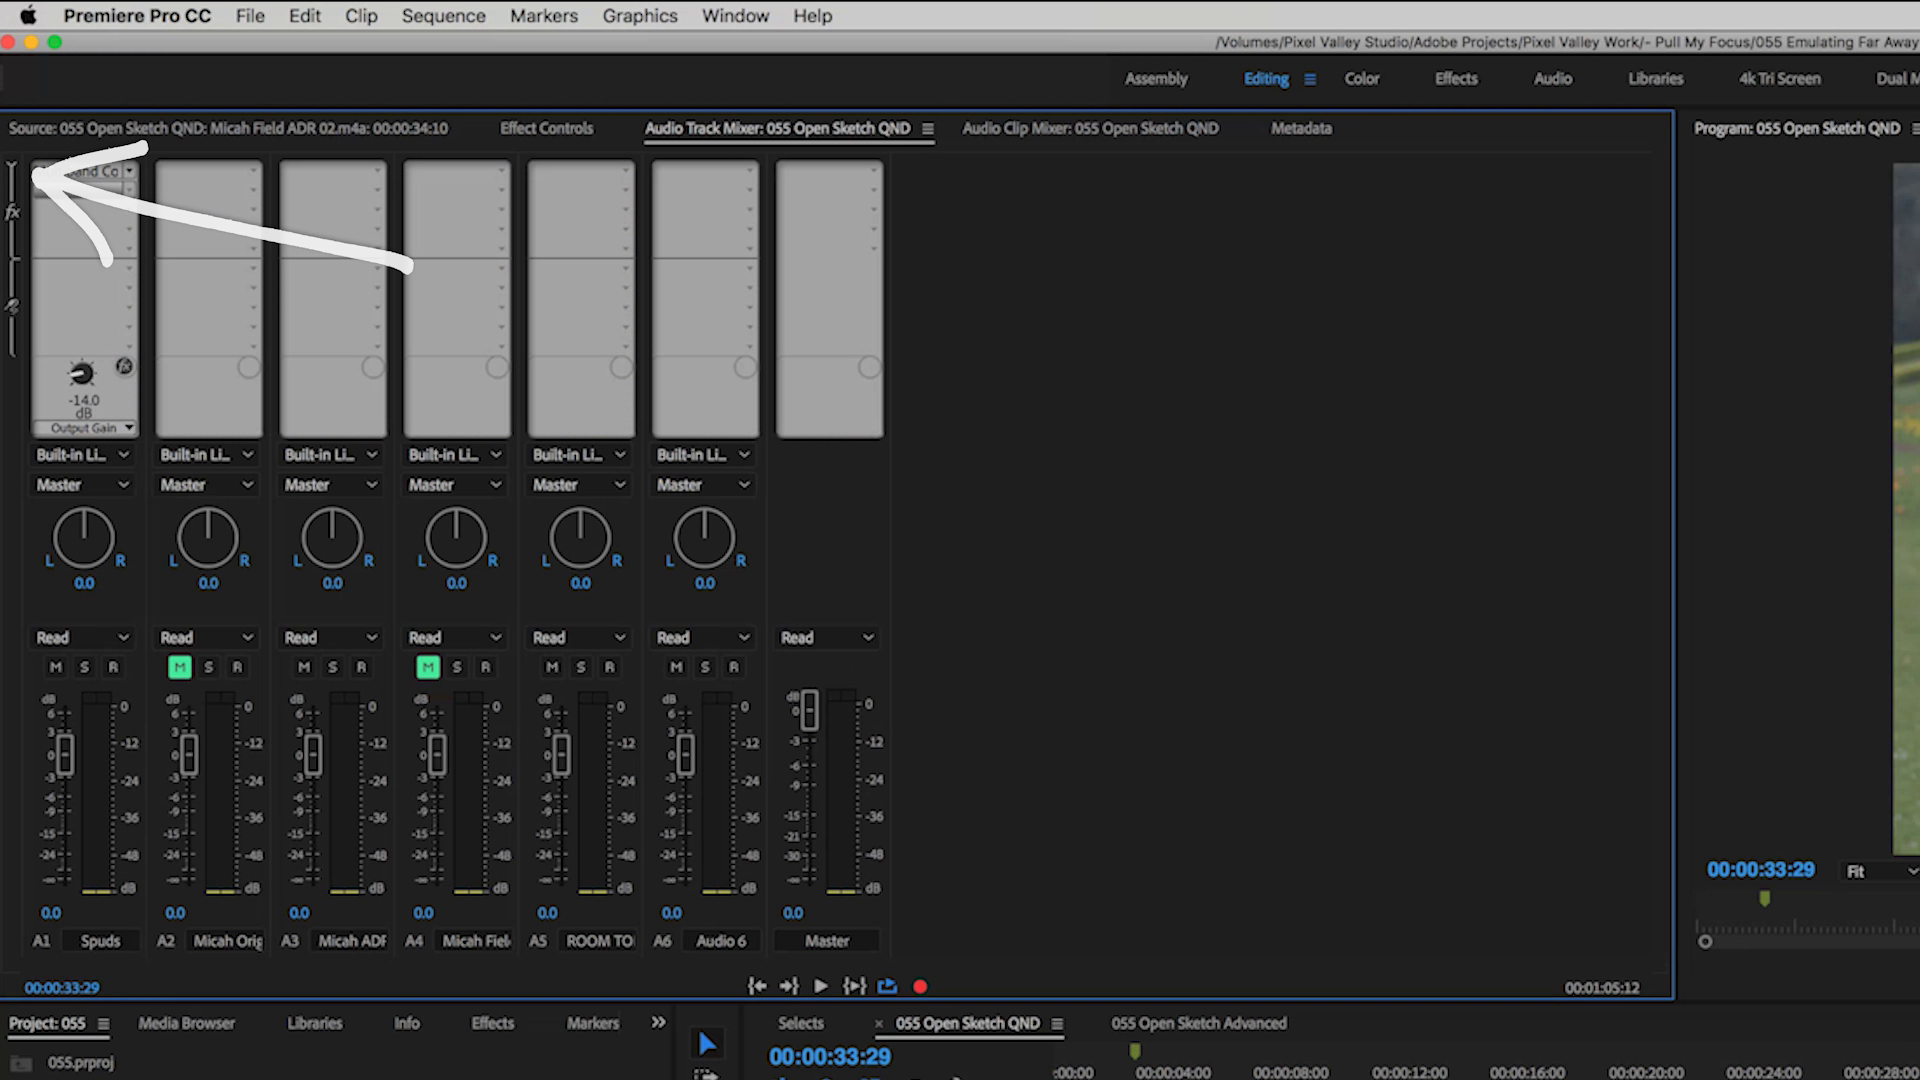
Click the ">" to reveal the Effects / Sends panel.
And this is where the magic happens. Now I’m able to add up to ten effects or sends per track. We want to alter the volume so we don’t need the effects panel just yet. Let’s bring Micah’s volume down to about -6 DB because it’s supposed to sound like he’s far away.
It’s getting there but he still sounds like he’s really close to me. So let’s play with the other parameter, which is Equalization.
Equalization
High frequencies have a hard time traveling really long distances. Low frequencies are really easy, which is why you can buy a subwoofer, stick it in the corner of your house and it’s still effective. So let’s bring the highs down on Micah’s voice so it sounds like he’s further away. An easy way to do this is to go to his track and under FILTER and EQ add PARAMETRIC EQUALIZER. When I first click it nothing happens so double click it and now here’s my interface. Don’t get scared, this is really easy. The right side represents the high frequencies, the left side represents the low frequencies and the middle the middle frequencies.

Parametric EQ
I’m going to choose GENERIC LOW-PASS under the presets and that will effectively drop the highs. See how that line just dives down in the high frequencies? Let’s just use that. You can tweak everything that I’m talking about to mold your sound to be the way you want it to be.
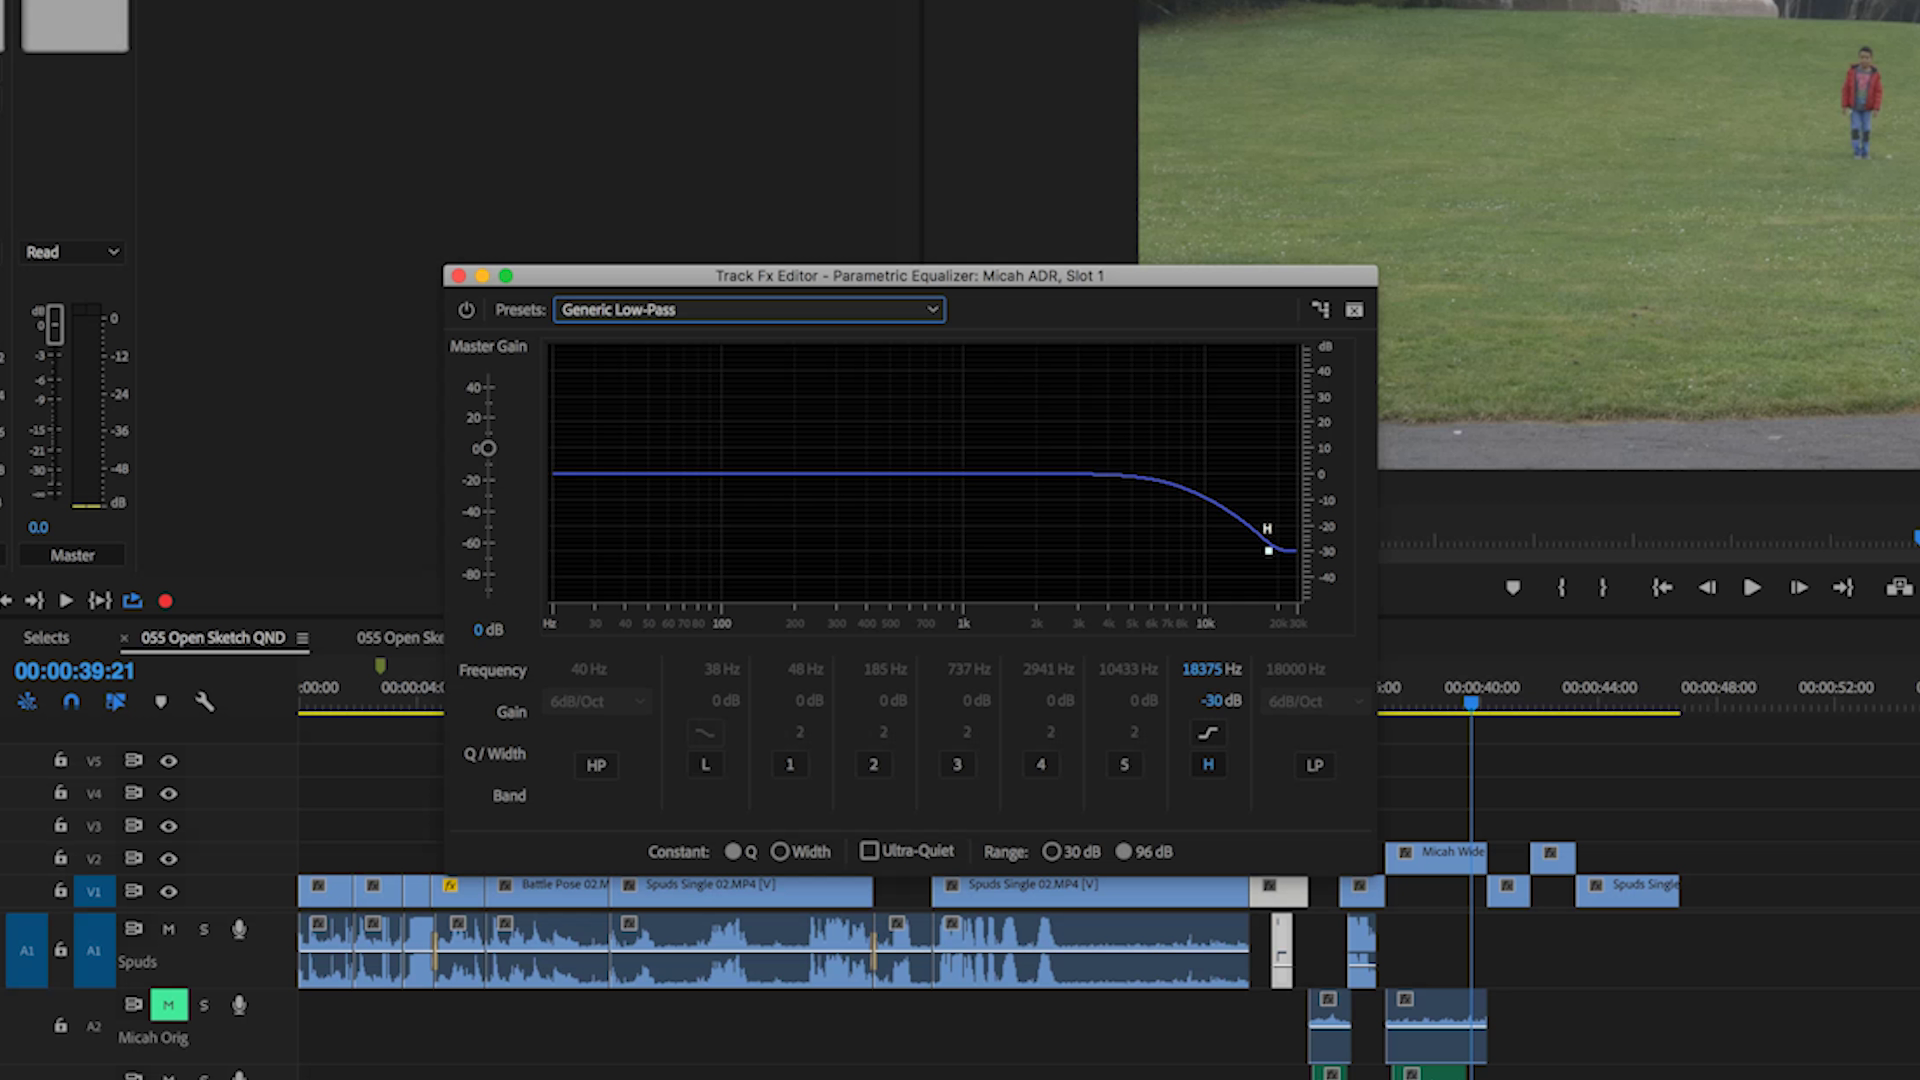
Generic Low-Pass filter Preset enabled
It’s getting there. In fact it sounds really good. Note, try not to edit little bits of audio in a vacuum without hearing the rest of the mix. This will help you to tune the sound just the way you want it.
We didn’t use our room tone yet. Whenever I talk there’s room tone because I recorded room with my voice. But whenever Micah talks the room it dies. It’s like a vacuum of nothingness. So let’s grab some room tone.
It’s amazing how far room tone surrounding your audio can really bring your audio into the environment.
The last thing I want to talk about is REVERBERATION.
Reverb
Please do not mix up reverb and echo as they are different. Let’s come back up to our track editor. We’re going to add STUDIO REVERB because that’s the simplest one that we have access to. Double click and we have all these neat parameters.

Studio Reverb settings. We will alter the WET parameter in this example.
The only one I really want to look at right now is called the WET. The dry level is the actual source sound the wet level is the processed sound. If I bring the wet level all the way up to dry all the way down let’s take a listen.
I’ll bring the dry back up to about 80% and bring the wet down to about, I don’t know, maybe 14.3%. Yeah that sounds good.
I think that's pretty much it. There’s a lot of tweaking you can do with those three parameters but I managed to take his raw audio that’s clean and dry and just void of space, and make it seem like he’s talking to me from a distance. He’s still very clear and we can understand what he’s saying.
Once again, we worked on VOLUME, EQ and REVERB.
Convolution Reverb
Let’s go into a little more advanced procedure. What I’m going to do is show you what’s called a convolution reverb. We’re still going to deal with volume and EQ, but we’re going to use a convolution reverb to create a more realistic simulation of an environment.
I’ve altered the volume, I’ve done the EQ. Now I’m using convolution reverb instead of just studio reverb. Let’s take a look at the convolution reverb settings.

Convolution Reverb to the rescue.
There are all these neat little presets: “cold house”, “back of the class”, “backstage area”, etc. The IMPULSE is an actual recorded space that the algorithm gets to use to create a new simulated space. Basically, when you’re using convolution reverbs, you’re using the digital recording of an actual space which creates a more realistic environment than an algorithmically created reverb like the studio reverb. You can record your own space and that’s what I did.

There are different ways to do it. I went the quick and dirty route. I set up my audio recorder in the space. I hit record and waited for it to get nice and quiet and then I made a really loud noise. I clapped my hands together. Some people that pop a balloon or something like that. Bring that back into the studio for later.
I will double-click my convolution reverb and instead of using a preset impulse I’m going to hit load and load in my convolution sample. Boom. I’m pretty much done. All I need to do now is control the volume, but let’s just take a listen to how it sounds. Convolution reverb is amazing for helping you take separate tracks of clean audio and putting them in an environment so they all sound similar.
That’s about it. Leave a comment and let me know different ways that you come up with creating far audio or if convolution reverb is something that’s brand new to you.